This year for San Diego Comic-Con David and I went as Anakin and Padme. I'm 7 months pregnant, and he looks kinda like Hayden Christensen, so it was perfect.


The collar was just one really long straight piece of gauze folded in half and sewn to the tunic. I sewed it right sides together to the tunic, then went and stitched in the ditch to catch the back side of the collar. Stitching in the ditch is very tedious. I had to go slow and get really close so I could see where I was sewing.


Anakin reference images can be found on the Padawan's Guide website. I was trying to make the costume accurate enough to join the rebel legion. I don't think I got it perfect, but the requirements are posted here, and this gave me a really good starting point.
I made everything that David is wearing except his boots and pants (bought from a thrift store for a different costume) and his light saber (bought online for $12 or something. It's one of the really cheapie ones).
FABRIC:
Outer tunic and Obi (sash): Espresso colored gauze fabric. ($4/yard, I bought 5 yards from Denver Fabrics online)
Tabards and belt and glove and accessories: Flannel-Backed Faux Leather Majik Dark Brown ($7/yard, I bought 2.5 yards)
Under tunic: Ramtex Microsuede Chocolate. This fabric was leftover from my boots. I used maybe 1/4 yard or so for the under tunic.
OUTER TUNIC:
My main reference for how to make the outer tunic was this Rebel Legion forum, and I used the rebel legion requirements page fro some specifics on fabric and collar widths and such. On the forum someone made a very detailed post about making the outer tunic, and I followed it exactly (with some shortcuts,and changing the measurements to match David) to make the tunic.
The tunic is a single layer of gauze fabric and I chose not to line it. This forum talks a little more about the shoulder tucks.

The pieces of the tunic, minus the collar.

Close up of the fabric
The collar was just one really long straight piece of gauze folded in half and sewn to the tunic. I sewed it right sides together to the tunic, then went and stitched in the ditch to catch the back side of the collar. Stitching in the ditch is very tedious. I had to go slow and get really close so I could see where I was sewing.

Stitching in the ditch.
Because the collar was just a straight strip of fabric, it didn't rest against David's neck, so I had to sew out a triangle of fabric so it would rest against his neck. This made a seam in the back that wasn't there previously.

Sewing it like this made the collar have a little point that stuck out, so I sewed horizontally across this to correct it.

Final version of the collar.
I hemmed everything by folding under twice and top stitching with about a 1 inch hem.
INNER TUNIC:
I have no pictures of the inner tunic. I made it the night before in about 5 minutes. The inner tunic is fake, it has no sleeves of anything, it is just safety pinned to the outer tunic and is only a neck piece.
I cut out a rectangle of fabric that was maybe 18 inches wide, and 2 feet long (give or take). I folded this in half wrong sides together and top stitched 2 inches from the folded edge. This was the "collar" for the inner tunic. I wrapped this around David's neck, and cut clips into the fabric (the part of the fabric that was hidden by the outer tunic) at each shoulder and at the back of his neck so it would lay flat against his body. I safety pinned this to the outer tunic and called it good. I didn't seam finish or anything.
OBI:
The obi is made out of the same fabric as the outer tunic. Like the outer tunic, I followed this tutorial for the shape of it. I used fusible interfacing to give it structure. It closed in the back using 5 sew on snaps.

I only interfaced one side.

Clipped corners.


LEATHER TABARDS:
The leather tabards were made following the same Rebel Legion forum as for the obi and outer tunic.
I cut out the leather, sewed it, folded over the edges, and hot glued them down. Hot glue works pretty well for fleece-on-fleece connections.


The fleece on the back of the tabards was white, so I decided to spray paint it black so you couldn't see the white bits ever. The spray paint was really sticky on the vinyl parts of the tabards, so I brushed it with baby powder so it wasn't so sticky. It was still slightly sticky if you touched it a lot.


In the end the tabards were probably a little wide, but they were close enough.
The tabards keps slipping off David's shoulders, so last minute I sewed on some some velcro along the shoulder seams of the outer tunic, and hot glued some velcro perpendicular to that on the leather tabards. The velcro made it so the tabards didn't slip off his shoulders, and sewing the strips perpendicular to each other made it so the position of the tabards was adjustable.
BELT:
The belt is actually 2 belts. The wider one I made from the faux leather, the smaller one I purchased from a thrift store.
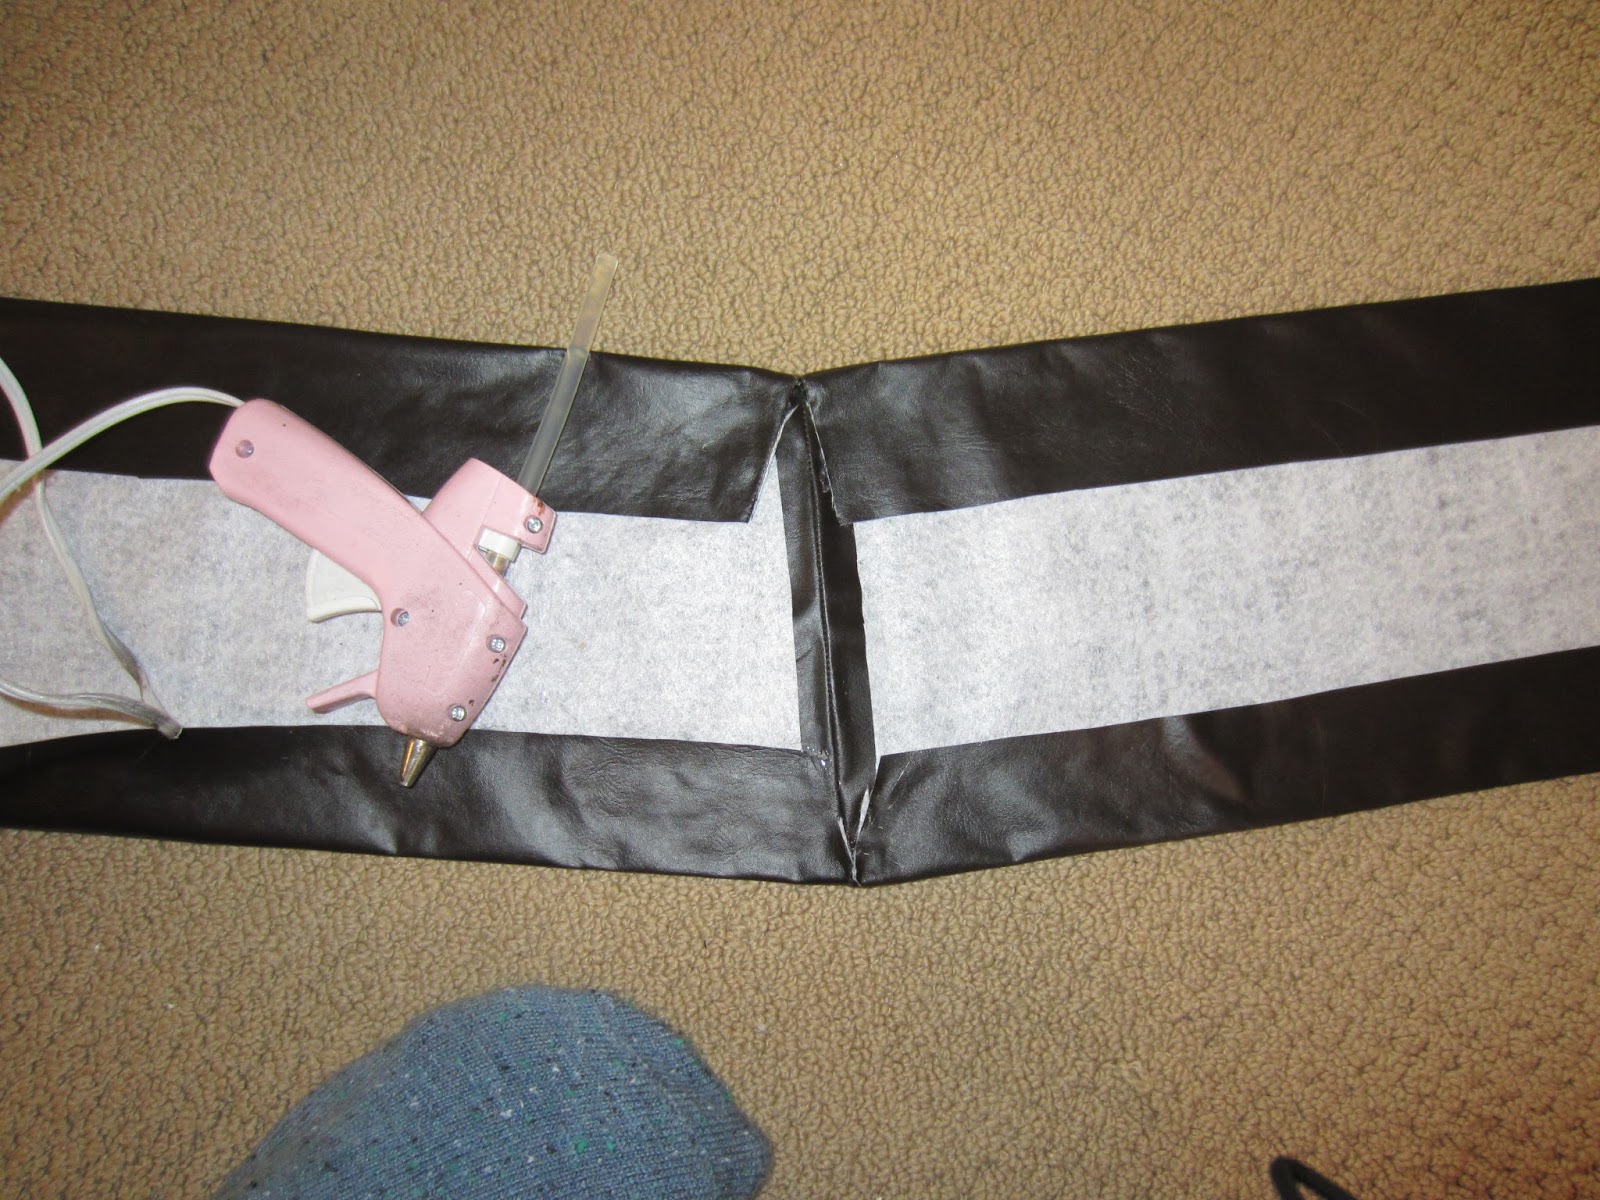
The wider belt was just a rectangle of faux leather that, when sewed in half, was 2.25" in width. I sewed the belt wrong sides together, and just put the seam against David's body so it couldn't be seen. I didn't want to have to deal with flipping the faux leather inside out.
The belt closes with a single sew-on snap (note: hand sewing through faux leather is hard and really hurts your fingers). The connection is covered up with a large belt loop (about 2" wide) that the actual costume has. I hand sewed the belt loop onto the belt.
I painted the belt with a few layers of brown acrylic paint (mixed with fabric paint medium to make it fabric paint) to lighten up the color of the belt.(I can't remember what I used the nail polish remover for. Maybe I mixed it with the paint.)


The thinner belt was black, so I painted it with the same brown fabric/acrylic paint to lighten it up.

You can see the color difference.
GLOVE:
The glove was the most detailed, most frustrating bit of this costume. I found a glove pattern online, and had to practice sewing it a few times. This is the first glove I ever made.
I used the faux leather, which was a large part of why it was so hard. Faux leather is not very forgiving. I followed the sewing instructions, making everything a little bigger than David's hand. I had to hand sew a little bit of of the thumb at the base.

Image of glove.

Pattern traced from my computer screen.
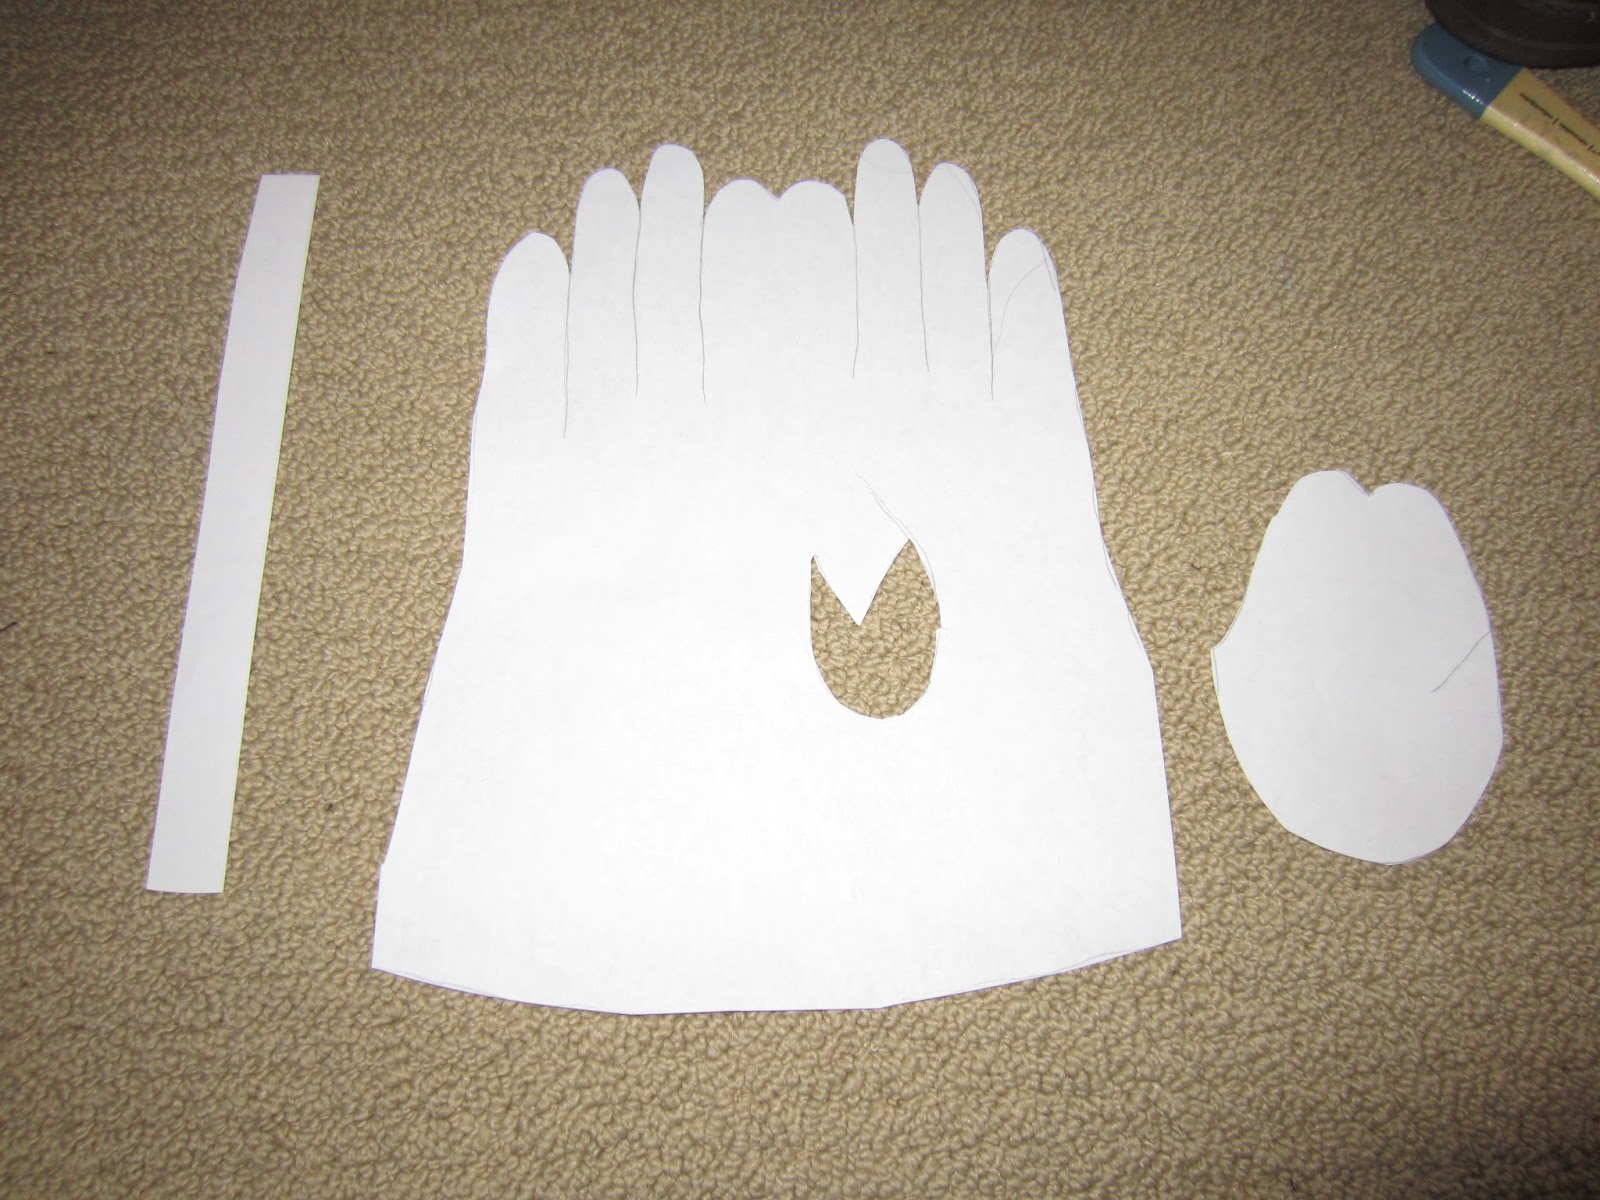

This slit is way too big. I ended up making it smaller in the final version.


The thumb.

Note: the seam on the outer edge of the hand (pinky side) is still open at this point!
For the back of the hand, I took 2 pieces of faux leather, sewed them together in a square, stuffed it with polyfil, then sewed straight lines into it to make ridges. My sewing machine is really cheap and couldn't handle sewing through all that poyfil, so I used this really powerful (but less convenient and less accurate in needle position) 1950's sewing machine I just barely inherited from my grandma. I sewed this into the glove, and the only way this was possible was because the outer edge of the glove had not been sewn closed yet. It was still tricky, though.


For the wrist part, I sewed 2 pieces of faux leather together in the pattern seen below, and stuffed the 3 wider sections with polyfil. I then wrapped it around David's forearm and made note of how wide it had to be at the wrist and elbow. From there, I sewed it to the hand of the glove. Then I added the buckles (bought off amazon) and leather straps around the glove.

The top of this picture is the end that is closest to the elbow.

Chalk lines showing where I sewed this together to fit David's arm.
Note: because the forearm piece is not curved at all, the glove ended up being slightly pointed at the seam, but it was against his body and nobody could see it.

Buckles bought off amazon here.

How the buckles attach to the leather straps.

Rubber found in flooring section of Home Depot.

Thin strips of rubber were cut from this, and glued on top of the leather straps.


You can see the pointy-ness I described on the right side of this picture.


ACCESSORIES:
For the bullet things I molded them using Fimo clay. I baked them, then painted them with acrylic paints. To attach them to the belt, I hot glued a bobby pin on the back of each one, which just clipped on to the belts.


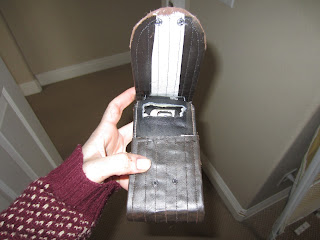
The front pouch thing was a cell phone case I bought from a thrift store and modified. I cut off the lid of it and wrapped the front/back with a layer of faux leather that I had sewn lines into. I attached the cover to the container with hot glue. I hot glued snaps on it to close it, but the hot glue doesn't work well on vinyl, so they kept coming off and it ended up just staying open during the convention. I sewed a loop on the back so it could loop around the belt.

The one on the left.

I cut out the metal attachment that stuck out.


Test fitting.

Right before gluing it on to the pouch.


I used my camera case as a base for the back accessory. I wrapped it in faux leather, which I glued two small round pieces of cork to, and painted tan/brown. I wanted to still be able to use my camera case, so this cover is not permanent and can be slipped off at any time.

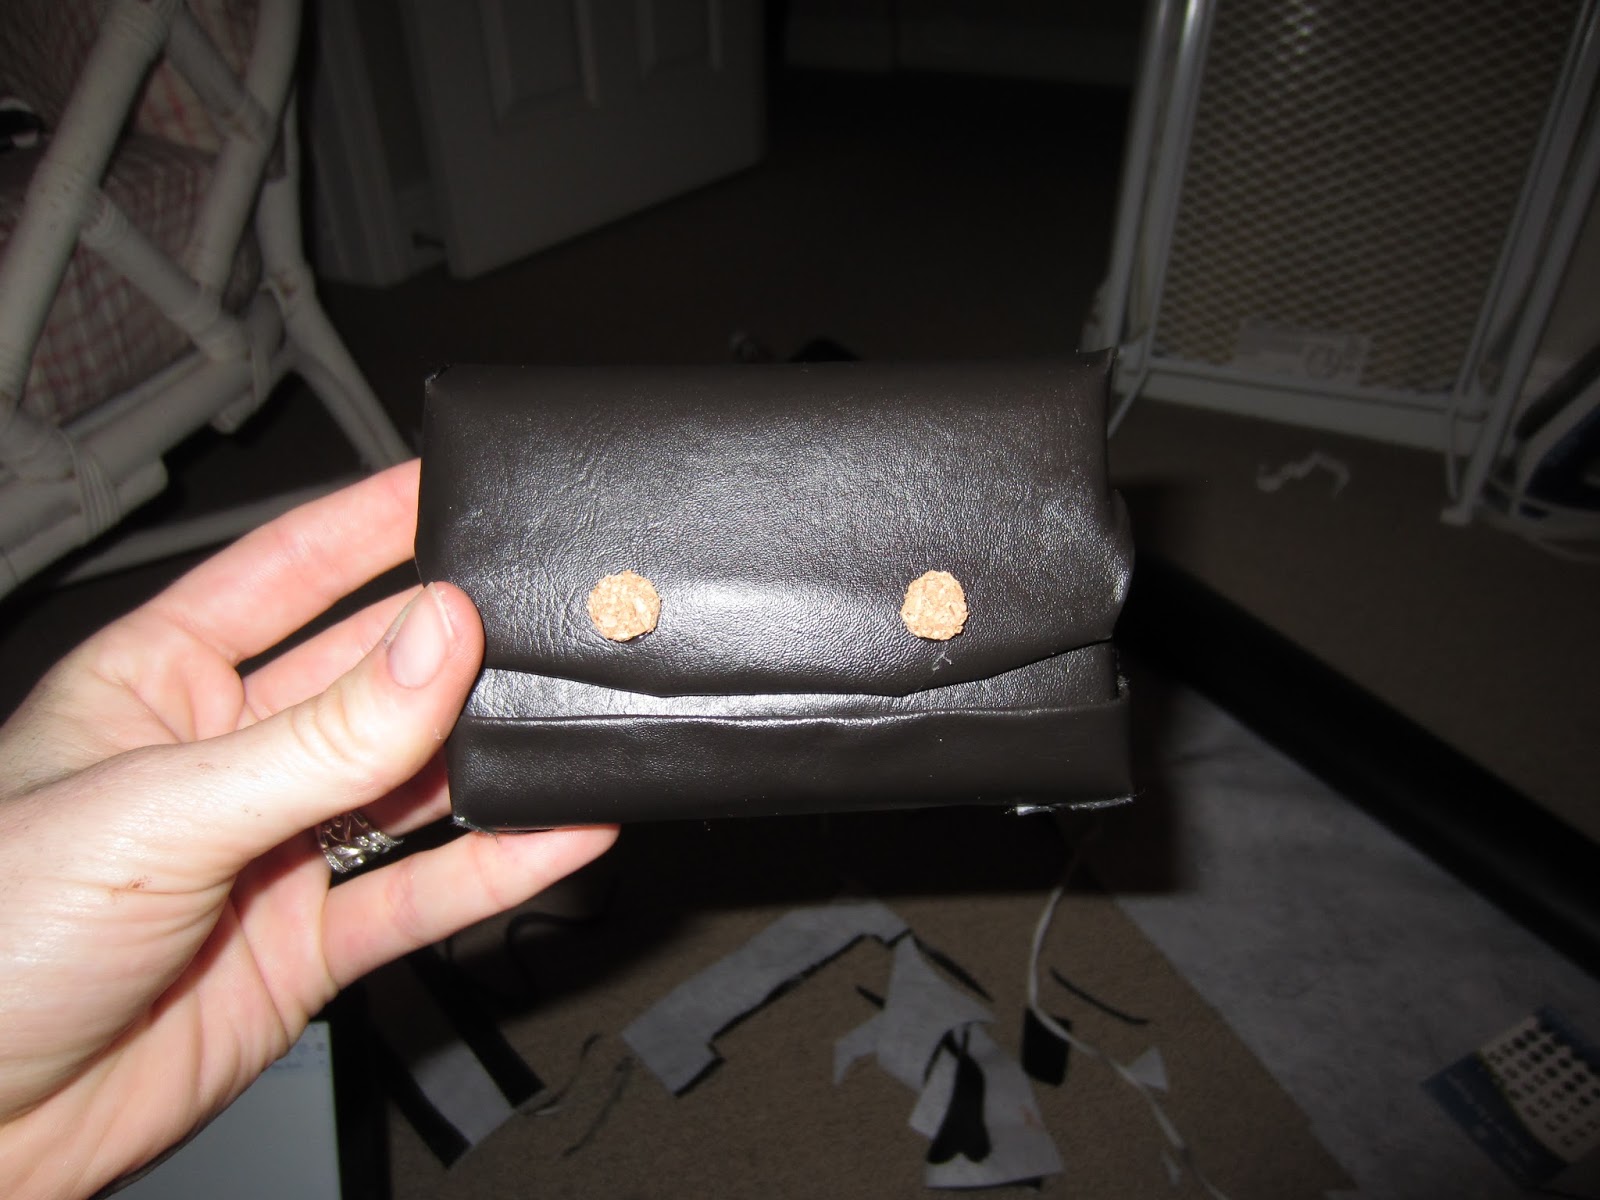


The loop is still exposed so I can slip it on the belt.

White layer first.

Then tan.

More tan.

Brown detailing.
The other accessory I made using an old cell phone flip phone I bought on eBay. I painted it black/maroon (after priming it first).


The light saber was purchased here and was attached by hot gluing 2 bobby pins to it so it could clip onto the belt.

MAKEUP:
Well, we didn't put any makeup on David, but he took a shower before the convention and we put gel in his hair while it was still wet. This made it look wet all day long, which is how it looks in the movie.
For his scar, I put some maroon colored eye shadow where the scar would go, and covered it with 4 layers of rigid collodion.


Makeup only.

The rigid collodion indents his skin to look like a real scar.


Finished Product:


The force be with you!
ReplyDeleteDo you think can make one for me. Im from México and i want mmaried with that suit...
Hola! Desafortunadamente sería muy caro. Con todo probablamente alrededor $400 USD para todo (salvo los pantalones y botas). It would be cheaper to buy it online! But if you still want it then let me know :)
Delete